The Contribution Management Tool allows you to record and submit superannuation contribution data to our Administrator Manager, Datacom Connect Limited.
The Tool contains macros (actions used to automate tasks) designed to assist you to:
- record contributions data
- check the accuracy of the data
- keep a record of data batches that have been submitted.
This guide provides instructions on how to maintain the spreadsheet, by:
Create New Batch
Contributions data must be submitted every time a payment is made for the superannuation scheme. As such, contribution data should be entered into the Contributions Management Tool, and submitted every payday.
Options for creating a new batch depend on your payroll software, potential options include:
- import direct from an exported CSV/Excel/Text file
- copy/paste from a third party application,
- enter the values manually,
- use previous batch data
Follow the instructions below to complete the relevant information in the spreadsheet, and submit the data batch to Datacom Connect Limited.
Click on the Contributions Data tab to open the correct worksheet.
Enter the pay date in the appropriate field, at the top of the worksheet.
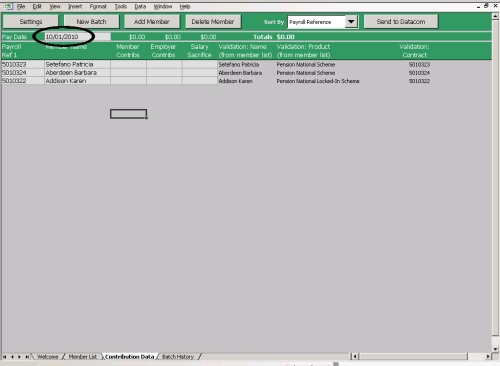
Note:The Contributions Management Tool will allow you to submit data for any pay date occurring within the last three months, and up to one month in advance.
Click the ‘New Batch’ button at the top of the worksheet to access the New Batch – Options menu.

Select one of the following options for entering batch data into the spreadsheet:
‘Clear amounts from this page’, if you wish to remove all previous contribution amounts, and input new contribution amounts manually. See Amend Contributions.
‘Clear this page and refresh members from the Member List’, if you wish to remove all previous contribution amounts, and update the batch details to include all employees listed on the Member List. You can then input new contribution amounts manually. See Amend Contributions.
‘Clear this page, then paste new data from clipboard (via import screen)’, if you wish to paste information from another spreadsheet into the new data batch in the Contributions Management Tool. See Paste Contributions.
‘Clear this page, then import an existing file via import screen’, if you wish to access contributions data held in another spreadsheet, and import the information to the Contributions Management Tool. See Import Contributions.
‘Cancel’, if you wish to return to the previous batch details, and amend the contribution amounts manually. See Amend Contributions.
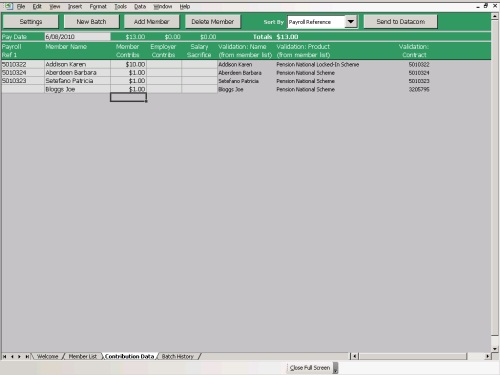
Check that the information in the Contributions Data worksheet has been entered, or imported correctly, and that all the necessary contributions for the batch have been listed.
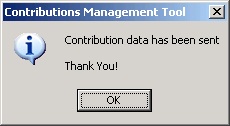
Click the ‘Send to Datacom’ button to automatically attach the batch details to a new email message.
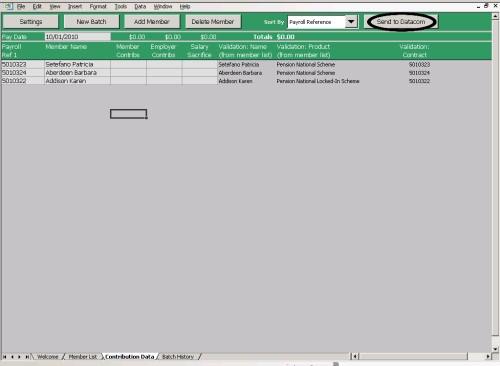
Send the email. (If unsure, you may cancel at this point and nothing will be sent or recorded)

Note: If you are sending data for more than one product, you may be prompted to send more than one email
If the batch details also need to be sent to your payroll or finance department as part of your internal payroll process, open the Batch History worksheet. Customise, then click the ‘Email Payment Request’, to automatically attach the batch details to a new email, and send the email.
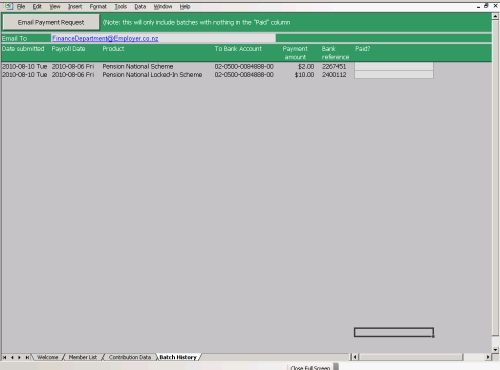
Batch History is a product specific summary of the bank accounts, amounts and required references for batches successfully emailed.
Add a New Member
To add a new employee to a data batch, the details of the employee, including a unique National Provident contract number and payroll reference, must already appear on the Member List.
To add a new member to the Member List:
Click the ‘Member List’ tab, to open the correct worksheet.
Click the ‘Add Member’ button at the top of the worksheet to add a new member line to the list.
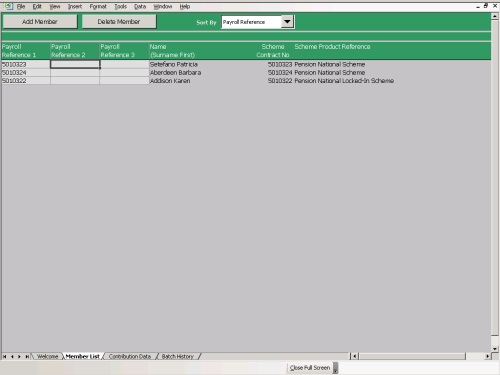
Enter the Payroll Reference/s, employee’s name, and a valid National Provident Fund contract number in the relevant columns, and select the relevant product from the dropdown box.
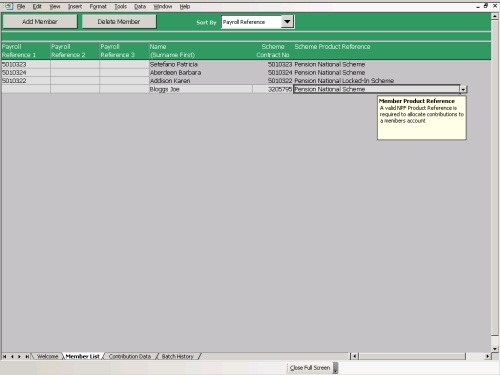
Important:Contribution data must not be sent for a new member until you have a valid National Provident Fund contract number for them.
Add an existing member to the current batch
Ensure that the member has been added to the Member List.
Click on the Contributions Data tab, to open the correct worksheet.
Click the ‘Add Member’ button at the top of the worksheet to add a new payment line to the batch.
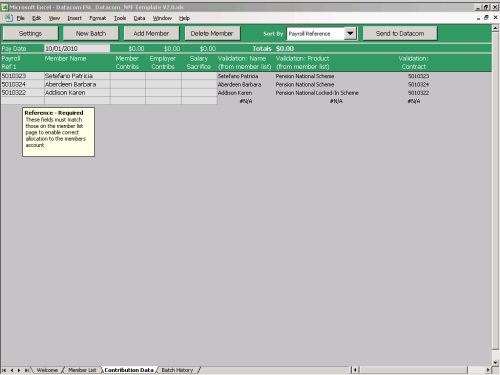
Type the Payroll Reference in the first column of the newly created line.
Once there is a reference in the Payroll Ref 1 column validation details will appear on the right-hand side of the worksheet (Columns L-N). Check that the validation details match the details of the payment you wish to make.
Type the employee’s name in the Member Name column.
Complete the batch details as normal (see Create New Batch section, above).
Delete member
It is not necessary to delete a member or contribution amount from a batch when there is no contribution to be made during a particular pay period. Simply leaving all contributions columns blank will show that no payment is to be made for that member, and will leave the member’s details showing for use in the next batch.
However, if you do wish to remove a member from a batch, or permanently remove a member’s contract details from the Member List, follow the instructions below:
Open the relevant worksheet by selecting the Member List, or Contributions Data tab.
Select the row containing the information you wish to delete (you may only delete one row from the Contributions Data or Member List at a time).
Click the ‘Delete Member’ button at the top of the worksheet to delete the row.
Amend Contribution amounts
Type the applicable contribution amounts for each member’s contributions into the relevant columns (e.g. enter a member contribution, employer contribution, etc. for each member, as applicable).
Paste Contribution data
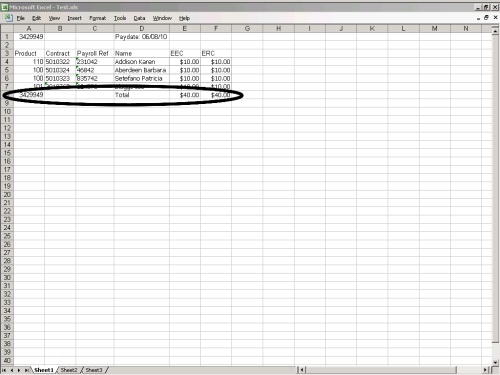
Ensure that the source document contains the necessary payroll reference number/s, member names, and contributions details.
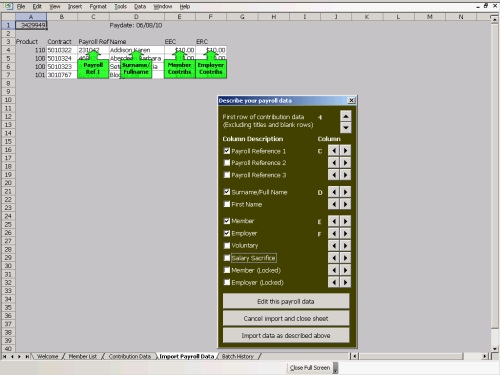
Select and copy the information, and paste it into the Import Payroll Data worksheet (which appears whenever the import, or paste options are selected from the New Batch – Options menu).

Delete, or do not include any information after the last row of relevant member data (e.g. totals, notes, etc).
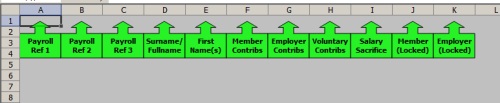
Click on any of the green pointers to open the ‘Describe your payroll data’ window.
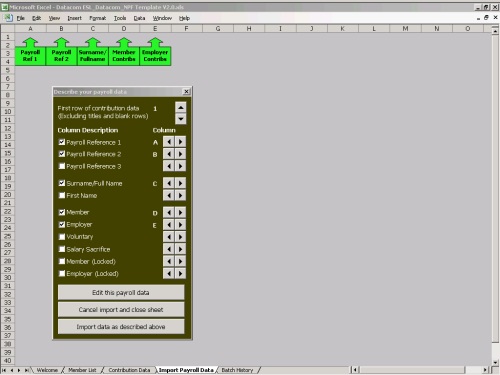
Select the first row of contribution data, using the up/down arrow buttons. (Excluding title rows etc)
Customise Column Selection to match the contribution data being used, using the check boxes.
Select the applicable Column for each Column Selection, using the left/right arrows.
Select:
- ‘Edit this payroll data’, if you wish to update the copied information in the Import Payroll Data worksheet before importing the information to the Contributions Data page.
- ‘Cancel import and close sheet’, if you wish to close the Import Payroll Data worksheet, and return to the data batch without importing any payroll data.
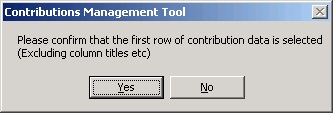
- ‘Import data as described above’, if all the information is correct, and you wish to import it to the Contributions Data worksheet. The spreadsheet will attempt to validate the first row of data, and may prompt you if it is not 100% sure that the row selected should be the starting row.
Import Contribution Data
Ensure that the source document contains the necessary payroll reference number/s, member names, and contributions details, and that there is no further information (e.g. totals, notes) after the last row of relevant member data.
Select and open the source document.
Select the first row of contribution data, using the up/down arrow buttons.
Customise Column Selection to match the contribution data being used, using the check boxes.
Select the applicable Column for each Column Selection, using the left/right arrows.
Select:
- ‘Edit this payroll data’, if you wish to update the copied information in the Import Payroll Data worksheet before importing the information to the Contributions Data page.
- ‘Cancel import and close sheet’, if you wish to close the Import Payroll Data worksheet, and return to the batch without importing any payroll data.
- ‘Import data as described above’, if all the information is correct, and you wish to import it to the Contributions Data worksheet. The spreadsheet will attempt to validate the first row of data, and may prompt you if it is not 100% sure that the row selected should be the starting row